directory
Abstract: Solar street light is a new type of clean street light, widely used in the field of public power lighting due to its advantages of stability, safety, energy conservation, and environmental protection. The installation of solar street lamps is different from that of ordinary street lamps. Firstly, the foundation needs to be poured, and after the foundation solidifies, the solar street lamp components, including the assembly of solar panels and LED lamps, need to be assembled. After assembly, the lamp pole is lifted, and after lifting, the battery and controller are installed. After adjustment, they can be pre embedded twice. When installing solar street lights, attention should be paid to the selection of installation location and time, as well as the angle of the battery panel. Let's learn about the installation method of solar street lights together.

1、Installation method of solar street lights
Solar street lights have the advantages of good stability, long lifespan, high luminous efficiency, easy installation and maintenance, high safety performance, energy conservation and environmental protection, and economic practicality, and are widely used in the field of public power lighting. So how to install solar street lights?
1.1 Pouring foundation
(1) Establish the installation location, and based on the construction drawings and geological conditions of the survey site, determine the installation location of solar street lights in areas where there is no shading at the top of the street lights, with a distance of 40 meters between the street lights as the benchmark.
(2) Excavate the foundation pit for streetlights. When excavating the foundation pit for streetlights at the installation location, attention should be paid to confirming and protecting the cables, pipelines, and other facilities at the excavation location.
(3) Bury the battery, build a battery box in the excavated foundation pit, and bury the battery box inside.
(4) Pour the embedded parts of the street lamp foundation, place the embedded parts of the solar street lamp in the pit, and place one end of the steel wire pipe in the middle of the embedded parts, and the other end at the location where the battery is buried. And keep the embedded parts, foundation, and ground at the same level, and use C20 concrete to pour and fix the embedded parts.
(5) After the construction is completed, timely clean the residue on the positioning plate, and after the concrete solidifies, start installing solar street lights.
1.2 Installation method of solar street lamp components
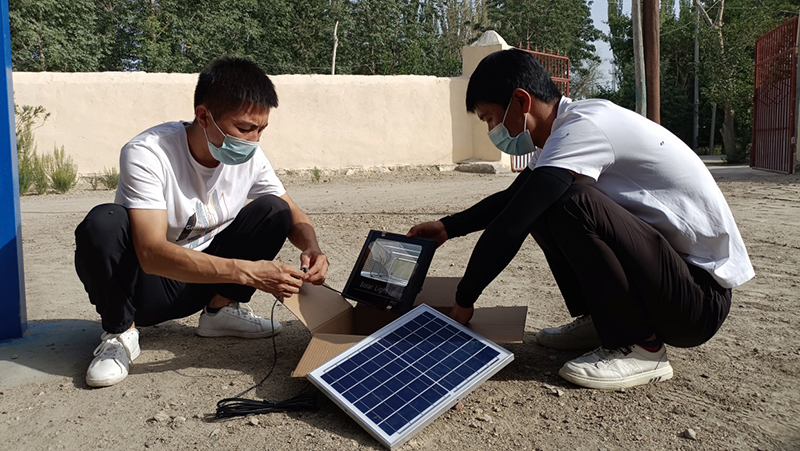
(1) Installation of solar panel: Place the solar panel on the panel bracket, tighten it with screws, connect the output wires of the solar panel, pay attention to the correct connection of the positive and negative poles of the panel, and tie the output wires of the panel firmly with ties. After connecting the wires, tin the wiring of the panel, and then place it aside to wait for threading.
(2) Install LED lighting fixtures: Thread the light wire out of the lamp arm and leave a section of light wire at one end of the lamp head where it is installed; Support the lamp pole, thread the other end of the lamp wire through the reserved hole on the lamp pole, and route the lamp wire to the top end of the lamp pole; Install the lamp cap on the other end of the lamp line, align the lamp arm with the screw hole on the lamp pole, and then use a quick wrench to tighten the lamp arm with the screw; Mark the end where the light wire passes through the top of the lamp pole, and use a thin threading tube to thread both wires together with the solar panel wire to the bottom end of the lamp pole, and fix the solar panel to the lamp pole.
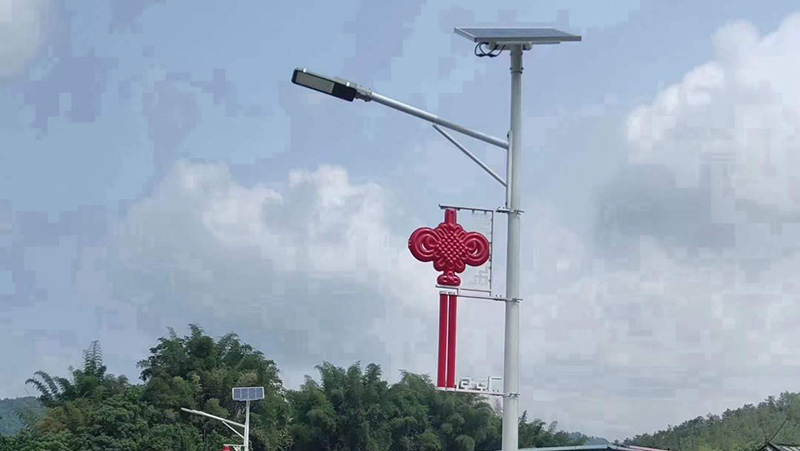
(3) Lamp pole lifting: After checking the fixation of each component, thread the lifting rope into a suitable position on the lamp pole and slowly lift the lamp. When the lamp pole is lifted directly above the foundation, slowly lower the lamp pole and rotate it to adjust the lamp head to face the road surface, and align the holes on the flange with the foundation bolts; After the flange plate falls on the foundation, install a flat washer, spring washer, and nut in sequence, and tighten the nut evenly with a wrench to secure the lamp pole.
(4) Install the battery and controller: Place the battery into the battery well and thread the battery wire onto the roadbed with fine iron wire; Next, connect the connecting wire to the controller, connect the battery first, then the load, and then the solar panel; Debug whether the street lamp works normally. If it works normally, set the controller mode to make the street lamp light up. If there is no problem, the lamp cover of the lamp pole can be sealed.
1.3 Component adjustment and secondary embedding
After the installation of solar street lights is completed, check the overall installation effect of the street lights, readjust the tilt of the lamp pole, and check whether there is any deviation in the sunrise angle of the battery panel and whether the lamp cap is legitimate; After confirming that all adjustments have been made, the base of the light pole is pre embedded twice, and the base of the light pole is built into a small block with cement to make the solar street lamp more secure and reliable.
2、 What to pay attention to when installing solar powered street lights
Solar powered street lights can save energy and alleviate energy consumption, making them a very practical new type of street light. However, when installing solar powered street lights, it is also necessary to pay attention to some aspects, such as:
2.1. Installation position
Try to avoid installation in low-lying road sections. When pouring, pay attention to whether the installation site is backfill soil. If it is backfill soil, the foundation pit should be deepened and enlarged to ensure the stability of solar street lights in the later use.
2.2. Installation time
The installation of solar street lights should be carried out on sunny days. If installed on cloudy and rainy days, it will only consume electricity without charging after the lights are turned on, which will not meet the design requirements; And it should be noted that the lights should not be turned on as much as possible on the day of installation. After charging for a day the next day, the load should be connected in the evening.
2.3. Angle of battery panel
The bracket for solar panels is usually made with a good tilt angle before leaving the factory. When installing, it is only necessary to ensure that it faces south and there are no obstructions around it. If the deviation is large, it may need to be adjusted.
2.4. Pay attention to wiring
Solar street lights belong to low-voltage systems, and when wiring, the main task is to distinguish the positive and negative poles. After determining the positive and negative poles of the battery panel, light source, and battery, it is necessary to strictly follow the wiring instructions on the controller for operation.